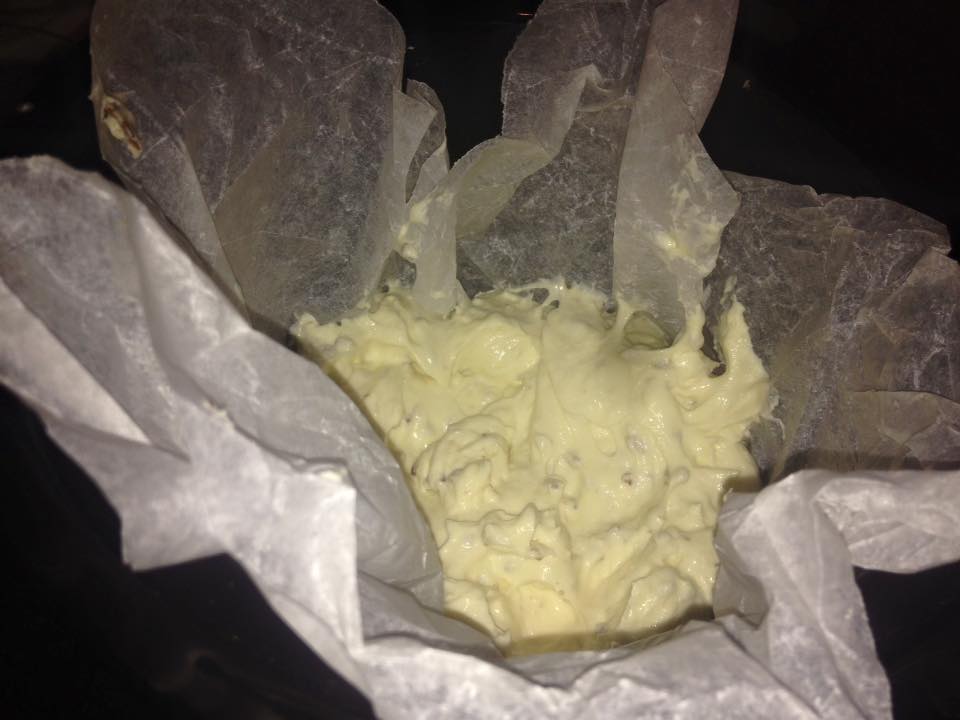
Aunty Thels Df Gf Ef pastry.

I am so thankful for my BFFs Aunty Thel: the clever lady who made a recipe for biscuit pastry and her lovely family who allowed me to share her recipe. This pastry has changed my life. Today we found that not only can this recipe be made gf and df but also egg free to  this makes a huge difference for parents trying to make lunches for kids with allergies (their own and classmates). If you don't put meat sauce inside the pie it's also perfect for vegans too

Gf Df Ef Aunty Thels Biscuit pastry.

2 *chia eggs* (2x 1 tbs chia seed, 1/4 cup boiling water, stir and leave to sit til cool)
2-3 tbs coconut oil
1 cup gf self raising flour
1/4 cup corn flour

Measure flours and oil into MyCook jar
Mix 5 seconds sp 5 till combined
Add 1.5 chia eggs and press knead button (This dough did not come together the way an egg type does but when you take 2-3 small dough balls, they squish together it's ready allow dough to rest)

Half hour in fridge is good.
Roll dough out.
Cut to size pop in pie maker add filling and lid.
Cook.

You can use any thermo-cooker to make this pastry, or even a food processor. I have chosen the MyCook terminology as it is a little less confusing... Jar is called TM bowl or jug in Thermomix world).

** Results
Dough was easy to roll, a tiny bit chewier than the egg kind but still delish.It dod not brown as the butter and egg type. If doing again and not feeling so lazy in the morning; I would grind the seeds before adding hot water.

*** Fridge dough was made into pies on day 3. Both doughs were a little stiff, but chia dough stiffer. I added some water and worked the dough and it rolled very well. Each dough gave me 1.5 more pies and a small biscuit. I used the base of the chia and lid of the egg dough to make the 3rd pie.

What to do if you have too any pies... You can keep in the fridge for as long as the meat will allow ie if you have fresh meat 3 days, if you are using 3 day old meat obviously it will not last in the fridge. The pies also freeze well too. I have microwaved pies and eaten them cold. You can also reheat them in your pie maker (if that's what you cooked it in). I would also venture to say that they can be warmed in the oven as you would a store-bought frozen pie. 


Meat sauce - MyCook method

4-5 steaks, cubed (stewing meat)
1-2 onions (can use 1 onion and add onion flakes
2-3 carrots
1 zucchini
2 MB's wine (200g)
1 MB water (It was slightly too much liquid so it may pay to add 50g water instead of 100g or less wine)
heaped tbs corn flour (I would add more next time, 1.5-2tbs heaped)
heaped tsp gf *vegemite* (whatever passes for vegemite at your place)
1 tbs tomato paste
1 tbs soy sauce
1 tbs tomato paste
1 tbs Worcestershire sauce
pinch salt and pepper to taste
good shake of paprika
Dash of olive oil
Handful fresh basil

Grate zucchini and basil, remove from jar.
Wash out.
Add oil, set timer for 1 minute 120c, Sauté
Add onion 5 mins, 120c, sauté
at 4 min mark add carrots, 1 min mark add vege stock paste.

Add cubed stewing meat, cook 120c 10 mins sp 1.
Add rest of ingredients cook 100c 60 mins; MB on.
When done check if meat is tender if yes give it 10 mins MB off and allow to reduce. If not do this step with MB on until soft then reduce sauce.
  
Meat sauce - GSM/TM type machine method


Grate zucchini and basil, remove from jug.
Wash out.
Chop onions and carrot, sp 5 few seconds. You want them chopped but not mushy 
Add oil, set timer for 1 minute 120c/Varoma/Steam
 at 1 min mark add vege stock paste.

Add cubed stewing meat, cook 120c/Steam/Varoma 10 mins sp 1/soft...  use blade cover, blunt blades or reverse if available.
Add rest of ingredients cook 100c 60 mins; MC on.
When done check if meat is tender if yes give it 10 mins MC off and allow to reduce. If not do this step with MC on until soft then reduce sauce.

Mini pie method

Find a big glass and a smaller one. The big glass should be about 8.5-9cm in diameter and a nutino glass is perfect for the smaller. It should fit snuggly into the top of your muffin tray.

Roll dough out, use large glass to cut the dough into pie bases
Place pie bases into muffin trays
Add about 2 tbs of pie meat
Carefully pick up smaller dough disk. Run some water around the edge with your finger to help it stick to the base. Add lid.
Cook in moderate oven 10-15 mins

** small pieces of chopped apple are also nice in small pies. If you use pink lady apples no extra sugar is needed. For extra flavour try a little allspice, cinnamon,or Chinese 5 spice.


Cooking with MyCook and Kids

Pie News
First some bad news my estimates completely out as I measured out the mince sauce with a 1/3 cup but the recommended size is 1/2 cup. This resulted in a rather disappointing set of pies with overcooked bases and undercooked lids.
My neice was visiting over-night and I was keen to divert her from the devices today... the easiest way I have found to do this is to offer cooking... so we made more pastry and made some more pies today and added peas (not mushy) and stirred them through the mince before cooking.Everyone was happy except mr Fussy (who does not like peas in his pies).

Gluten Free Bread (Egg and Dairy free too)
We decided to make pies and Gluten Free bread... a new recipe I found here. You do not need a thermo-machine for this recipe. A mix master should work or even mix by hand. I love it, if I didn't prefer whole meal for health, this would be my go-to bread. Basically I needed fresh bread crumbs and thought that if it didn't taste nice it would be an easy way to get some... fyi if wondering, yoghurt bread works out more expensive and goes funny in the freezer. 

Me being well me... I made a few changes...

Orgran for Freefrom gluten flour (I measured 500g)
Oven for slow cookers
Thermomix for MyCook

TBH I was concerned that the lowest setting for MyCook was 40c and I wondered if it was too high. However when browsing actual MC yeast recipes I found that 40c was recommended so I proceeded.

I was surprised that there was no sugar included in the recipe but the yeast did its thing quite well.  Miss J commented that the mixture looked like chocolate chip ice-cream... She was not so impressed with the taste raw, but enjoyed it warm with butter and mighty-mite.

After a quick safety lesson, Miss J was also proficient in using the MyCook lid and found no difficulty getting it on or off.

The bread was lovely and moist with a soft crust. It did not brown as the artisan bread does, but straight out of the oven it was delish. This bread was as easy to make as the "easy bakers" bread from a packet but is nowhere near as salty.

Judie


Australia Day Food... Meat Pies

Meat pies, what can I say... they are yummy and they are Aussie, but if you a gluten free they are frozen, expensive, hard to find and/or disappointing. The really great pies are usually found in small country bakeries... I have fond memories of Bernies (in Rocky), Gracemere, Emu Park, Yeppoon and Mt Morgan (in that order) pies with mushy peas and several flavours to choose from. The decisions - this pie has the better filling; but the base on that one is divine... its all part of the pie-eating culture the ranking of personal favourites then discussing it with your mates... Upon reflection; BP had a nice gourmet pie and so did the chain of bakeries - in Shopping Fair (who calls it Stockland???) and Allenstown plaza. Bakers Delight is on the tip of my tongue but its the other one.

The secret to getting someone to pay $4 - $6 for a pie when they could just get a pack of them for $6 - $8 is making it unique, something they could not make at home, and leaves the eater thinking... I want another one. I cannot say that I am there yet with my pies but they are better than frozen and some gluten-eater bakery pies I have tasted and certainly better than the majority of frozen GF pies I have eaten. Moreover they are much more cost effective, can be eaten cold and are easy to make. 

I have shared with you Aunty Thel's biscuit pastry recipe, on this blog and here but did you know that if you remove the sugar it makes an awesome savoury crust. 

Each brand of GF flour is slightly different. If dough is too sticky just add more flour when rolling it out. If it is too dry add a little water.

  • 160 grams Self Raising Flour, I use Gluten Free (1 Cup)
  • 60 grams Butter
  • 1 egg + a spare yolk or white (whichever you prefer parting with)... if making a double batch just use 3 eggs.
  • Corn Flour, (1/4 cup)
MyCook method (works for TB1 type machine too)
Put dry ingredients into the MyCook jar, close lid

Press turbo for 2 seconds to sieve the dry ingredients.

Weigh in the butter- 60g = 3 tbs, use speed 5, 5-10 seconds until mix looks like breadcrumbs

Add egg, turn dial to closed lid position, press the knead button (Looks like a dough roller)

If making a double batch wizz on sp 5 for 20 seconds first. 
Dough is ready when it looks like a ball of playdough, if it has trouble coming together pop some water in half an egg shell and tip in.  

If it is too sticky just add a little more flour when rolling dough out for cooking. 

GSM method (TM, TC etc)

Put dry ingredients into the jug, close lid

Press pulse for 2 seconds to sieve the dry ingredients.

Weigh in the butter- 60g = 3 tbs, use speed 5, 5-10 seconds until mix looks like breadcrumbs

Add egg
Wizz on speed 6, 10 seconds then speed 1 for 1 - 2 mins. (If using a machine that has a knead button press it and knead till its done)
Dough is ready when it looks like a ball of playdough, if it has trouble coming together pop some water in half an egg shell and tip in.  

If it is too sticky just add a little more flour when rolling dough out for cooking.
 

Meat Sauce (MyCook)
Heat oil in MyCook jar for 1 minute 120c on Sauté 
Add onion (quartered) some pepper, paprika and any seasoning you like... I added onion flakes as my onion was a little small. 5 mins, sauté 
** if adding Tomatoes or Carrots you will want to add them here**

Towards the end of the 5 mins, add a tbs Veggie stock paste

Set timer for 10 mins sp 1 - 2 (If using a TB1 type machine, add bade cover here)

While blades are moving add mince in large chunks through the beaker hole in lid. Then add 1 tbs corn flour and another of tomato paste; 1 measuring beaker each full of water and wine, a very heaped tsp of whatever passes for Vegemite in your house, any veggies you want to add.

Keep an eye on the mince. When it is cooked turn it off and pop into a casserole dish/thermal dish 

Meat Sauce (GSM, TM, TC etc)
Chop onion sp 7 add oil to jug for 5 minutes, sp 1, ST, Varoma etc (higher than 100c) to Sauté 
** if adding Carrots you will want to add them here, "grated" with onions** 
Add some pepper, paprika and any seasoning you like... I added onion flakes as my onion was a little small. 5 mins, sauté 
** if adding Tomatoes you will want to add them here**

Towards the end of the 5 mins, add a tbs Veggie stock paste

Set timer for 10 mins sp 1 - 2 / spoon + reverse (If using sharp blade swap to blunt)

While blades are moving add mince in large chunks through the beaker hole in lid. Then add 1 tbs corn flour, and another of tomato paste, 1 measuring cup (100mL) each full of water and wine, a very heaped tsp of whatever passes for Vegemite in your house, any veggies you want to add.

Keep an eye on the mince. When it is cooked turn it off and pop into a casserole dish/thermal dish

I have not tried this yet but it may work to steam the meat in the rice basket with some salt and the wine and add to veggies in the last minute of cooking.
Pie Peas

Honey does not agree, but what is more awesomely

Queenslander than peas in your pie... Add some frozen peas and water to your jar (we like McCains), cook 

If peas are cooked but not mushy pulse your turbo button for 1 - 2 seconds. Repeat if needed... Making your own mushy peas helps to avoid the additive tartrazine in your children's food.

 Judiet


Mayo Madness

I have probably mentioned before that I hosted my besties first ever Thermomix demonstration. She asked me if I could get a few friends together, supply a few ingredients and eat some yummy food so that she could practise on us. Out of that party, my friend sold one TM31 that night, another person at the party had bought a TM from her within 3 months and at the party of the first buyer yet another TM was sold. 

I will never forget how her confidence as a person soared becoming a demonstrator... and I will never forget one line "Thermomix consultants make their own mayonnaise"... I don't know how many times it took my bestie to get it right but here is what it looked like for me.

The first time I tried making mayo was with a TM31 and the Everyday Cookery book recipe (the original, I am not sure if it was updated in the newer book). Dismal fail. The 2nd time was with the 4 Blades magazine recipe using the Kogan TB1. Perhaps it was because it required a 37c but the Kogan goes has a 40c setting. I was tired of wasting precious ingredients and gave up entirely.   

This is a thing I had struggled with. I didn't like consuming all the "nasties" and finding a good brand that used free range eggs, no gluten and a decent enough oil was a nightmare. I found a supermarket brand we liked, and then it was discontinued. I played with a few organinc ones and we did like the S&W brand and Macro... but they just were not quite the same.


It was time to face the mayo dragon again. I decided that if it did not work this time, I was getting a stick blender... I saw this exciting method of making fool proof mayo a while back here.

So this is the recipe I tired first. I cannot thank this blogger (Rachel) enough because her demonstration of the MyCook recipe led to the first mayo that ever worked for me.  

If you have to buy eggs or your chooks are lazy/broody or you can get oil for a mad discount etc this is a good recipe. It is a little oily compared to bought brands but you can definitely play with it, and the potato salad I made with it was awesome. If I made it again I would add French mustard and herbs at the beginning. 

Last night we tried this recipe Honey liked it a lot better. The website photo does not do it justice. We added 1 tbs French mustard  at the beginning. I plan to experiment with some sugars and acids soon to get it just right for us.

The dregs of mayo left in the jar were used to make a yummy coleslaw. The next night I persevered with the silicone spatula. Most of the first batch went to making Potato salad. The rest (along with some of the 2nd batch) went to making pasta salad. 

We use the EDC coleslaw recipe but I never bother measuring anything...


Mr Fussy's clone of Mrs Crockets pasta salad

Mayo
1/4 onion
1 capsicum (use red for authenticity but what ever is cheaper works for taste)
Pasta
200g Cheese (use less if you want the sauce "runny" like Mrs Cs)
2 small carrots or 1 large

Optional Frozen corn
Boil some water and add some salt, olive oil and half a pk of good quality pasta... I used San Remo spirals (about 250g). 

When done strain and flush with cold water... allow to cool (if your family like corn, now is a good time to sir through some frozen corn) and grab your fave machine... 

Grate 1/4 smallish to medium onion, 2 skinny carrots or a large (peeled) and a capsicum. 

Wash out jar (if you are like me and had no grated cheese) Grate a 1kg pk of cheese save about 200g and pop the rest in the fridge for next time. 

Grab pasta, check that it has cooled. 

Add veggies and stir

Stir through most of a jar of mayo (if using a cheep one go half/half with some cream or sour cream) 

stir though cheese then add the last dreggs of mayo and give one final stir through.

I have been advised that a gluten Free version of this could be made with Barilla but I have not attempted it yet.   


Mr Fussy's Potato Salad

1.5-2kg Potatoes, peeled
Handful *eschallots
Bottle of Mayo
Salt and Pepper

 
Bite size potatoes boiled in water with a pinch of salt.

Wizz some eschallots add to potatoes and sir through.

Season with a little salt and pepper

Confession: I need spice jars - the big ones; so I am using Masterfoods Chives lately instead of eschallots. Buying chives is one of the cheapest ways to get the spice jars... cheaper is if someone gives them to you or you can get them from Vinnies.

Judie


I love all things European... MyCook Premium and Linux - a closer look

Linux vs Windows
This year I decided to see what life would be like if I went Microsoft free at home... and mostly I have not looked back. Blogging however; has been a different story. I used to write my blogs from Windows live writer and there does not yet appear to be a comparable Linux blog writer... so apologies for the long delay between blogs. I'm backstage of blogger atm trying the "blog-thing online". If you like to stay up-to-the-minute please feel free to join my facebook group here. I write micro-blogs at least weekly, which are much easier to do from a tablet or phone.

Honey is still plugging away on his Win 7 (now 10) that keeps crashing, and complaining on each month around "Patch Tuesday" when his computer gets hijacked and forced to restart. For TAFE purposes I used open Suse, that was ok... but since finishing my course I have played with Fedora and smelled the fresh breath of Linux Mint and have had no regrets. It annoys me the way MS seems to permeate the Queensland education system... offering cheap licences to get people "hooked" and biting them with huge fees later.

Since first writing this post I have found that I can quite easily blog from the blogger dashboard and adding pictures is actually easier this way; however tagging them and cropping is slightly harder. Hence it hasn't been done since I stopped blogging with Microsoft. I can access this from my tablet and have written some blogs in a comfy horizontal position, and made minor changes later with my computer.


I love my MyCook
Now for some news... we have a new addition to the Rutterbugs thermo-machine family... Introducing the MyCook Premium or as I like to call her Mykah.I bought y myCook Premium from contacting the Australian distributors here.

It started a few months back when I saw this. Then this article too.It made me mad, that once again we were being blindly guided towards just one particular machine without really being told of the other fantastic alternatives there are in the world. I wanted people to know that they had options, and the best way to learn about a machine is to play with it.

The MyCook Premium lid could not be that difficult to remove, I reasoned and that was the only look in that viewers received about the Spanish machine. It had great reviews on YouTube. One chef in particular saying that young staff members were using it with ease. So I wanted to see if I could find out for myself if the MyCook Premium was comparable to my other "kids".

I am very glad I took a closer look as she has been a wonderful addition to our home.

First thoughts:

I remember thinking to myself straight away that I did not now think that either the ThermoChef or the Thermoblend 1 were modelled on entirely the TM. The TB1 jug, blades and mixing paddle or aka "butterfly" were very similar in shape. The lids both have "waves" on the top that are fantastic for keeping "spitting" to a minimum. The plastic and stainless steal of the MyCook Premium having a feel of quality, heavier and sturdier. Like the TC she was dark grey with pretty lights and most importantly the steaming baskets were stainless steal.

Lid

I have not found it any more difficult to remove or put on than any of my other machines. My sister who is a lefty really liked how it was not "right-centric" as some of the cheaper machines of mine she had used were. As I said above the waves help keep splatter to a minimum and are easily cleaned with a brush.

Beaker

You may know it as (Measuring cup, MC)... cute, stable (once again clear and easy to "overlook" when trying to find it in a hurry *wonders* can we get it in pink for Breast Cancer month? Handy to know... TM31 and TB1 measuring cups fit too... In case you are thinking of upgrading from TB1 (or believe having 2/+ machines helps run an efficient kitchen).

Jar

(aka Jug, bowl). Actually the same capacity as TM31, Bellini, Mistral and TBs 1 and 2. The base is a little more narrow and taller, though it is seated about 10cm into the machine so size is deceptive. I love that it has a plastic clip on the base (unlike TB1) which means that I can pop it into the fridge to cool when making French Onion dip, and saves my fingers from accidentally touching the hot base. I hae even seen it popped straight into an ice bath to cool while making yoghurt.

The narrower base makes it great for cutting herbs as they stay mostly at the bottom of the jar.

Recipe books

The MyCook recipe book has a list of gourmet meals very popular in Europe. The recipes are well set out, easy to follow on glossy paper which wipes clean.  I have tried a few recipes such as Spaghetti bol and churros (also available here) which is the recipe book for the older model MyCook professional. So far from the new book
I have tried 2 lots of dough and I intend to try more recipes from the included book once our family favourites are tried and tested.

 
Speeds 

I was sceptical but found it to be true that the slow speed is so soft that a reverse function or blunt blade is not necessary. In fact the slow speed is so soft it makes perfect spaghetti bol sauce without needing to cook the mince in the steamer and add at the last part of the cooking.  

I recently made corn relish with the intention of making corn relish dip for a work function. I used a Recipe Community recipe and noticed in the comments that the other mixers had shredded the corn slightly however, the corn was perfectly intact with Mykah's efforts.


knead function apparently has a method of "working the gluten" by "tossing" it with each spin, as I don't eat gluten I didn't really need it to bother, but found the one touch button handy for making pie and pasta dough.

Dishwasher

I love that everything except the blades are dishwasher safe... there is no *good* place for the blades in the dishwasher anyway. I find that they are easily cleaned with some water a toothbrush and dish-washing liquid. I love that there seem to be no places for the dish-washer water to *remain* and spill on your dry goods when unpacking the way my cheaper jugs and even TM bowl does. I love that there are no electrical bits on the bottom needing to be carefully dried before replacing back into the machine.

Functions

The sauté function is a fantastic touch, I find that I often use it in conjunction with my multi-cooker. It chops and sautés at the same time and being able to reach a hotter temperature gets the onions tasting just a little nicer.

Induction heating means that food cooks slightly faster and more efficiently.

You can set the timer for longer than 1 hour. Very handy for "stewing" meats saving some money and getting a great tasting product. I used cheaper cut meat to make stroganoff and curries cooking it for longer with great results.

Drawbacks

There is always a few with anything. There is no "fast" way to get to a minute (like pressing the - button first as with the Mistral and TM), but holding the + button more firmly makes digits spin over faster.

Burn marks; if you are using a TM recipe and forget to back the cooking-time off a bit (as I did) there was a nasty burn mark. However, I covered the mark with water adding 3 tbs bicarb soda, 5 mins 120c sp 4 and it came of very easily.

The temperature is what the machine is set to not what the food is at. If cooking something like cheese or yoghurt, a kitchen thermometer is handy (I needed one for my TB1, so this was not a problem for me).

There is no quick way to *wake up* a sleeping MyCook, it must be switched off then on again. But I like that it saves me some power in sleep mode. 

The whole *difficult lid* controversy

All I can say about that, is that it has never been a problem for me or the other MyCook owners that I have met online. Click on and off while in the unlocked position and it works every time... steamer and lid. I have cooked with kids (my neice and nephew, 10 and 11) who worked the lid with ease and also mentioned that they found it less tricky to work than their Mum's TM (they are Pro's at cooking rice).

Overall

I have lent each and every one of my thermo-appliances except my MyCook. I did so because I believed at the time that could live without them... and I did not miss them while they were gone... The same cannot be said for the MyCook. I use it almost every day and often multiple times in a day. It has features that I use often like a knead button, sauté function and can go up to 120c and I love that I can pop it in the dishwasher, go do other jobs and be ready to cook again in 30 mins without having to dry the jar.