Showing posts with label Egg free. Show all posts

Cheats Bread... Round 2

A few weeks back, I blogged my fantastic experience with Cheats bread by Me and My Thermie blogger, recipe here. I liked it so much I made it again... This time a double batch MyCook/Kogan cook off. I had plans for one to be another sandwich loaf and the other to be a cob... Hoping that my friend who I call the "cob-loaf" queen could fill it with delish cob filling and we could pretend we were not Gluten-Free for a few minutes. I aimed to get it round by cooking it in the 3L slow cooker. 

It was a shockingly hot day; the beginning for many for CQ and the bread rose very fast. In future I will use less yeast on days like today. The loaf dough melted all over the edges in the slow cooker. This possibly would have been ok if I had popped it in the oven as it would have cooked faster.

The second loaf looked like an extinct volcano. Very disappointing. Possibly the problem here was that I had lifted the lid too early to check how it was going. Not to worry, breadcrumbs I hoped... Then the ants found both loaves as they were cooling... at least the chooks were happy. So fresh bread loaves go pretty-much straight in the fridge. 

If I try for a cob shape again I will cook for the first hour without the kitchen towel between the ceramic bowl and lid, so that I can see how it is all going.  

Results

MyCook got the job done faster, the kneading was done in 1.5 minutes. Kogan took about 3 minutes. But the doughs were pretty-much identical by the time they were done.

Kogan had the option to heat to 30c or 40c I chose 40c as that is the one the MyCook recipes use for bread. I was not sure that 30c would be warm enough.

Aunty Thels Df Gf Ef pastry.

I am so thankful for my BFFs Aunty Thel: the clever lady who made a recipe for biscuit pastry and her lovely family who allowed me to share her recipe. This pastry has changed my life. Today we found that not only can this recipe be made gf and df but also egg free to  this makes a huge difference for parents trying to make lunches for kids with allergies (their own and classmates). If you don't put meat sauce inside the pie it's also perfect for vegans too

Gf Df Ef Aunty Thels Biscuit pastry.

2 *chia eggs* (2x 1 tbs chia seed, 1/4 cup boiling water, stir and leave to sit til cool)
2-3 tbs coconut oil
1 cup gf self raising flour
1/4 cup corn flour

Measure flours and oil into MyCook jar
Mix 5 seconds sp 5 till combined
Add 1.5 chia eggs and press knead button (This dough did not come together the way an egg type does but when you take 2-3 small dough balls, they squish together it's ready allow dough to rest)

Half hour in fridge is good.
Roll dough out.
Cut to size pop in pie maker add filling and lid.
Cook.

You can use any thermo-cooker to make this pastry, or even a food processor. I have chosen the MyCook terminology as it is a little less confusing... Jar is called TM bowl or jug in Thermomix world).

** Results
Dough was easy to roll, a tiny bit chewier than the egg kind but still delish.It dod not brown as the butter and egg type. If doing again and not feeling so lazy in the morning; I would grind the seeds before adding hot water.

*** Fridge dough was made into pies on day 3. Both doughs were a little stiff, but chia dough stiffer. I added some water and worked the dough and it rolled very well. Each dough gave me 1.5 more pies and a small biscuit. I used the base of the chia and lid of the egg dough to make the 3rd pie.

What to do if you have too any pies... You can keep in the fridge for as long as the meat will allow ie if you have fresh meat 3 days, if you are using 3 day old meat obviously it will not last in the fridge. The pies also freeze well too. I have microwaved pies and eaten them cold. You can also reheat them in your pie maker (if that's what you cooked it in). I would also venture to say that they can be warmed in the oven as you would a store-bought frozen pie. 


Meat sauce - MyCook method

4-5 steaks, cubed (stewing meat)
1-2 onions (can use 1 onion and add onion flakes
2-3 carrots
1 zucchini
2 MB's wine (200g)
1 MB water (It was slightly too much liquid so it may pay to add 50g water instead of 100g or less wine)
heaped tbs corn flour (I would add more next time, 1.5-2tbs heaped)
heaped tsp gf *vegemite* (whatever passes for vegemite at your place)
1 tbs tomato paste
1 tbs soy sauce
1 tbs tomato paste
1 tbs Worcestershire sauce
pinch salt and pepper to taste
good shake of paprika
Dash of olive oil
Handful fresh basil

Grate zucchini and basil, remove from jar.
Wash out.
Add oil, set timer for 1 minute 120c, Sauté
Add onion 5 mins, 120c, sauté
at 4 min mark add carrots, 1 min mark add vege stock paste.

Add cubed stewing meat, cook 120c 10 mins sp 1.
Add rest of ingredients cook 100c 60 mins; MB on.
When done check if meat is tender if yes give it 10 mins MB off and allow to reduce. If not do this step with MB on until soft then reduce sauce.
  
Meat sauce - GSM/TM type machine method


Grate zucchini and basil, remove from jug.
Wash out.
Chop onions and carrot, sp 5 few seconds. You want them chopped but not mushy 
Add oil, set timer for 1 minute 120c/Varoma/Steam
 at 1 min mark add vege stock paste.

Add cubed stewing meat, cook 120c/Steam/Varoma 10 mins sp 1/soft...  use blade cover, blunt blades or reverse if available.
Add rest of ingredients cook 100c 60 mins; MC on.
When done check if meat is tender if yes give it 10 mins MC off and allow to reduce. If not do this step with MC on until soft then reduce sauce.

Mini pie method

Find a big glass and a smaller one. The big glass should be about 8.5-9cm in diameter and a nutino glass is perfect for the smaller. It should fit snuggly into the top of your muffin tray.

Roll dough out, use large glass to cut the dough into pie bases
Place pie bases into muffin trays
Add about 2 tbs of pie meat
Carefully pick up smaller dough disk. Run some water around the edge with your finger to help it stick to the base. Add lid.
Cook in moderate oven 10-15 mins

** small pieces of chopped apple are also nice in small pies. If you use pink lady apples no extra sugar is needed. For extra flavour try a little allspice, cinnamon,or Chinese 5 spice.


Cooking with MyCook and Kids

Pie News
First some bad news my estimates completely out as I measured out the mince sauce with a 1/3 cup but the recommended size is 1/2 cup. This resulted in a rather disappointing set of pies with overcooked bases and undercooked lids.
My neice was visiting over-night and I was keen to divert her from the devices today... the easiest way I have found to do this is to offer cooking... so we made more pastry and made some more pies today and added peas (not mushy) and stirred them through the mince before cooking.Everyone was happy except mr Fussy (who does not like peas in his pies).

Gluten Free Bread (Egg and Dairy free too)
We decided to make pies and Gluten Free bread... a new recipe I found here. You do not need a thermo-machine for this recipe. A mix master should work or even mix by hand. I love it, if I didn't prefer whole meal for health, this would be my go-to bread. Basically I needed fresh bread crumbs and thought that if it didn't taste nice it would be an easy way to get some... fyi if wondering, yoghurt bread works out more expensive and goes funny in the freezer. 

Me being well me... I made a few changes...

Orgran for Freefrom gluten flour (I measured 500g)
Oven for slow cookers
Thermomix for MyCook

TBH I was concerned that the lowest setting for MyCook was 40c and I wondered if it was too high. However when browsing actual MC yeast recipes I found that 40c was recommended so I proceeded.

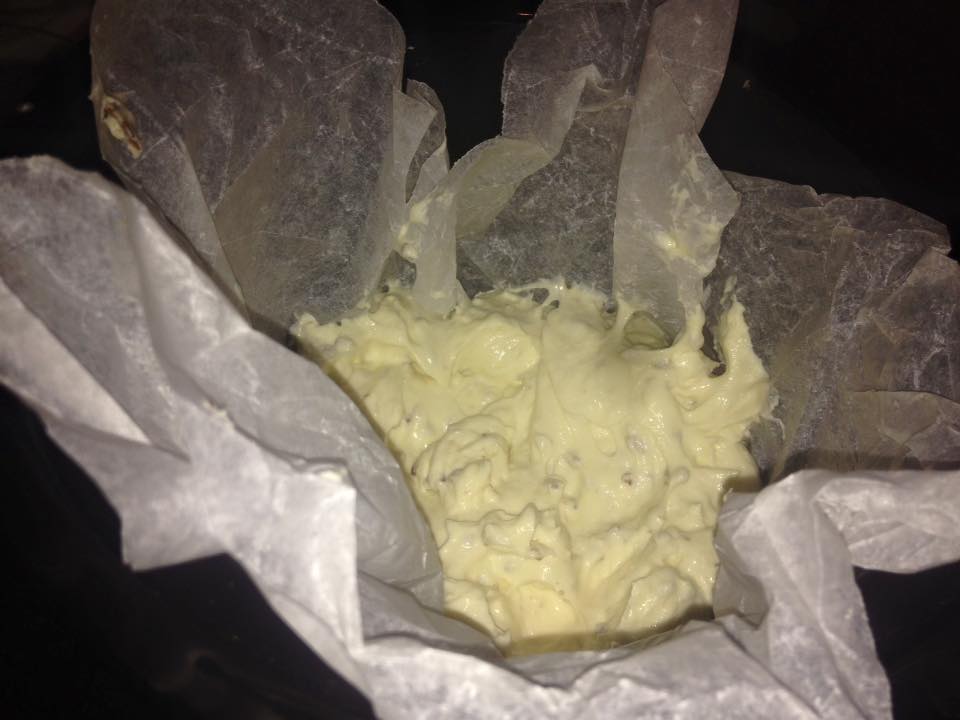
I was surprised that there was no sugar included in the recipe but the yeast did its thing quite well.  Miss J commented that the mixture looked like chocolate chip ice-cream... She was not so impressed with the taste raw, but enjoyed it warm with butter and mighty-mite.

After a quick safety lesson, Miss J was also proficient in using the MyCook lid and found no difficulty getting it on or off.

The bread was lovely and moist with a soft crust. It did not brown as the artisan bread does, but straight out of the oven it was delish. This bread was as easy to make as the "easy bakers" bread from a packet but is nowhere near as salty.

Judie


New recipes with Thermie

IMG_0823[1]I love Chicken Tonight Honey Mustard sauce, but I am not keen on the additives. This week I found on the recipe community a recipe that is how I remember it tasting, but looks slightly brighter in colour. Recipe here. Honey was not as excited as I was but he ate it without too much complaining. I also decided to try “filleting” chicken legs. there were a few bones that made it in, but I liked that I saved some money on the chicken meat, and our fury child had a huge treat he would otherwise have missed out on. It didn’t take that much longer to dice the chicken and it helped to have it slightly frozen still. If we didn’t have a huge Meremma that would be offended if we didn’t share our yummy food with him, keeping the bones would be invaluable for a delicious chicken stock. I now regularly offend our fury son by keeping our bones aside to make stock. IMG_0822[1]
What was somewhat disappointing in Honey’s reaction to the fist recipe, was completely restored in his reaction to the next one I tried this week, Chicken Satay also on the recipe community here. There were many to choose from, I did not have all the ingredients so made some substitutions… Fish sauce for oyster sauce, soy sauce for tamrai, sweet chilli sauce for a chilli, masala for fennel. Also honey is anti-mixed food, so I kept the veggies separate, steamed in the varoma.
The first batch of Satay I made, I added mushrooms to, as we had some and it was nice too. Our visitors enjoyed the food, and we enjoyed their company. Probably the next best part of having so many people love the food I made, was making some peanut butter. Honey turned me off buying some once by mentioning the “rats per tonnage” thing… We had lots of fun making it in under a minute with a Zero RPT.
IMG_0819[1]Tonight I made this recipe. If you are not a member of the group you may not be able to see the  I used mostly fresh herbs- ginger, garlic, onion, chives (from our garden) and corriander. I made the sauce in Thermie and poured it over some chicken wings (minus the “finger” parts, Snuffy enjoyed them) in the slow cooker and went off to work (I got this idea from a TM consultant who is in the group, she used drumsticks). When I returned home I cooked the rice and veggies in the TM bowl and varoma. It was very nice. However I think I will add some sweet potato next time to the curry. If you have any type Thermomixer machine, or even want one; I absolutely recommend joining this group on FB. Also worth a look is Thermobextas and Thermostruck.
Chicken Madras - HCG P2 Compliant, Paleo, Grain Free, Dairy Free
By Nikalene Riddle (Skinnymixers FB group)
I used Sweet chilli sauce instead of chilli flakes,  Omitted 2 handfuls of baby spinach and served with brown rice in lieu of cauliflower rice

Soups…

IMG_0755You might remember that I wanted to try making some Maltese soup in the TM, It worked but the timings were wrong and as a result I had chewy chicken, nutty rice, not quite done potato, carrots and celery. It was still a better lunch than the food they serve at the canteen.
Maltese soup (and I have found this also with Italian soup) is best served hot with a squeeze of lemon juice. When I was nanny for the Maltese family I learnt to make the soup from, the lemon juice was always fresh… when I moved on the squeeze bottles worked quite well (lemon and lime worked). Squeeze bottles do not work so well for me these days as “someone” puts the open ones back in the cupboard not the fridge and they go black by the time I need them again.
Lucky for me my Mother in law has some grapefruit trees that are going insane at the moment and she gave me a bag to try. I have been testing them to see if they can be used instead of lemons and in this case it’s a huge YES. I have played with this recipe and come up with this one. I have also found that small chicken legs will fit in the rice basket and can even be placed around the butterfly or you can "fillet" them with a knife and use the bones for stock. I have not tried this recipe with my MyCook and do not recommend the butterfly method for GSM machines as it is outside of what it was designed for.
I came across a “4 ingredients” recipe for chicken soup when I was unwell and tweaked it as I am not keen on canned foods and neither of us like hot roast chicken breast much either.
I used vegie stock, 1/2 chicken breast, Frozen corn, Onion and carrots
Wizz onion and carrots, sauté with a dob of butter
add cubed chicken breast, stock and corn, cook on varoma temp about 15 mins.
Enjoy your Yummy chicken soup.
I later tried this recipe with raw chicken, I cooked it in the basket for about half hour and cooked everything together for another half hour.
Chicken wings fit better into the steam basket than chicken legs, but both work. Wings are handy in that you can buy a kilo for about the same price as 1/2 a kg of legs. Chop the top of the wing (that looks like a little drumstick) and pop it in the pot. Save the middle part for hors d’oeuvres and treat the cats to the tips.
IMG_0757
This is the Pea and ham soup I made with Thermie this week. I used fresh peas as I have a lot of them doing nothing in my freezer. I found that cutting the ham chunkier helped too.
2 thick chunks of Ham off the bone
1 onion
2 carrots
Peas
Vegie stock and water
Chop onions and carrots in thermie speed 5ish add ham and sauté 10 mins.
Add the rest of the ingredients, make the water/stock go to the top mark. Varoma 1 hour, speed slow, reverse. Improve consistency by slowly turning the dial midway for about 10-20 seconds when the soup is cooked.

Spaghetti Bolognese Ragu

Dairy free, Egg free, Gluten free Bolognase and Lasagne/Moussaka

I have not made Spaghetti sauce exactly the way the EDC book suggested I make it in the entire time I have owned a TM until yesterday. I learnt to make salsa (as my friend Gladdys calls it) when I lived in Sydney and I have never used a jar of dolmio since. Gladdys is an exceptional cook and she would make this with gnocchi (from scratch) to go with it. I am not been able to enjoy instant gnocchi now either... fortunately the TM also makes fantastic fresh gnocchi and it is easy... it was one of the first things I made with my sister's TM waaay before purchasing my own.
It used to take a lot of chopping to make the salsa but for the longest time I have chopped everything in the TM and transferred all ingredients to the slow cooker to finish off... it certainly saved my wrists, elbows and feet from RSI. Before TM; it was not uncommon to find a hair in the salsa which was completely embarrassing but it was a lot of stirring to get it right. My family forgave me because it was yummy.
The first time I tried cooking the salsa in the TM; I changed the recipe around, I just did not see how it would work “dumping it all in together”. It certainly was not cooked for long enough in my opinion; and when it came out of the TM, the sauce was very fine and I liked mine chunky.
It took two things to make me try it exactly the way it is in the recipe... hearing my family member tell me how easy and nice it was (but I didn't really trust her... her old method of making SB was browning mince and tossing in a can of heinz spaghetti) and much more-so reading a blog and recipe by Iron Chef Shelly here. Hey if it was good enough for an Iron chef it was good enough for me I decided.

MyCook instructions

1. Heat oil in jar. 120c, 1 minute, sauté. Set timer again for 5 mins, 120c, sauté Add onion, garlic, carrot, oregano and basil into jar in that order. In the last few minutes add celery
2. Add minced beef and pork, bay leaf, salt and nutmeg and cook for 8 mins, 120c, sp 1
3. Add remaining ingredients and cook 15 mins, 120c, sp 1, MB on, take it off for last 5 minutes to allow sauce to reduce

Serve on a bed of cooked pasta. For Carb/egg free use zoodles or Carrot spaghetti.
 
Other Thermo-machine instructions 
 
1. Place celery, carrot, onion, garlic, oregano and basil into mixing jug and chop 5 sec/speed 7.
2. Add oil, minced beef and pork (to rice basket add salt and pepper and drizzle over wine), bay leaf, and nutmeg and cook for 10 min/steam temp/ measuring cup on


3. Add remaining ingredients and cook 20 min/100 C/Speed 1

Serve on a bed of cooked pasta. For Carb/egg free use zoodles or Carrot spaghetti.

Pasta Dough

300g Gluten Free flour (100 of which can be milled brown rice)
1 tbs EVOO (olive oil)
3 eggs (have a spare)

Add all ingredients to jar.

Press the knead button (looks like a rolling pin on MyCook, wheat symbol on TM)... If you do not have a knead button mix sp 6 for 10 seconds, then sp 1, 1-2 mins

Knead till it looks like playdough. If it is not coming together properly add half an egg shell of water to the mix.

Roll flat and put through pasta roller or scroll it up into a sausage shape and cut into similar size circles with a knife. Un-roll... looks a little wonky but is delish.

I still prefer chunky salsa, but I love that I can add heaps of veggies and Honey does not notice. I have to admit however I love the finer salsa for making lasagne. There is also one other slight tweak I did... I used entirely Beef mince, changed the oregano to Italian herbs and left out the nutmeg... I just couldn't make myself do it. I also make it with all wine and no water now, never use tinned tomatoes always passata.
 
 
So this morning I rolled out some pasta and assembled the lasagne, it made 3 layers (I usually get two)... or if I am completely lazy I just dump the salsa in then some small pasta like spirals (par-cooked) and top with TM cheese sauce. The benefit of this is you can use a round bowl (and my MIL potted me a special one to use- but for this time; I had not made enough sauce for it and my rolling pin would not cope with making a pasta layer that wide).
I used the scraps to make spaghetti and kind of risoni (You cannot buy GF risoni- I usually just swap it for rice in recipes) and popped them in the fridge for tomorrow.
My first attempt at fresh lasagne was using a lentil bolognese recipe here I of course just popped it all in the TM to cook.As I had also made cabonara that day for dinner, the vego lasagne was popped into the fridge for lunches. I ate some cold for breakfast the next day and the most incredible thing of all was that the cold pasta was not rubbery, so Honey and I had some for lunch and he commented that he preferred the beef one but the lentil lasagne was not too bad. Breakfast this morning was the last slice, reheated and it was nice that way too. Therefore I have a new favourite pasta... yea!
Our beef Lasagne was very yummy, we finished off the whole thing in one go. For df lasagne use coconut milk and oil to make bechamel sauce, add nutritional yeast for a cheesy flavour when sauce is finished cooking. For egg free use finely sliced potatoes or eggplant instead of pasta for a delicious moussaka. 


JUDIE


The taming of the Kogan - Beef Stroganoff

Beef Stroganoff
Davo has a middle name… Tyson, he keeps biting me. Tonight I made beef stroganoff Kogan style. The end result was pretty delicious. Says not just Honey but also an independent taste-tester. Recipe here

MyCook instructions

1. Place EVOO into jar and set 120c, 1 min, sauté. (If using butter cook on 100c)
2. Place the quartered onion into the jar. Set timer 120c, 5 min, sauté (if using butter 100c 4 mins)
3. Place remaining ingredients, except parsley into TM bowl and cook 120c, 15 min, sauté
4. Garnish with parsley and serve with fettuccine (Recipe here) for DF and mashed potatoes for EF option.

Other Thermo-machine instructions

1. If using GSM machine, pop in blunt blades. Place the onion into the jug and chop for 5 seconds, speed 7.
2. Add butter and cook for 2 minutes, 100°C, speed 1.
3. Place remaining ingredients, except parsley into jug and cook for 20 minutes, 100°C, Speed 1 or 2
4. Garnish with parsley and serve with fettuccine (Recipe Here) for DF and mashed potatoes for EF option.

Mashed Potatoes

Honey is not a fan of TM mashed potatoes... I know right - grounds for divorce. So we end up doing them the old fashioned way. I even had to go buy a potato masher. So as penance he is the resident potato-masher. 

So in my attempts to get him to "like" TM mash I tried the Skinnymixers steamed mash (but do you think I could find it) when I am adding to this blog post?

Basically... peel and cube your potato (use one species of potato as they cook at different rates). Pop them on the Steaming trays with enough room to allow the steam through.

Add water to your machine's jug and steam for 15 minutes till soft.

Remove potatoes from steaming trays and pop the water into a cup.

Add potatoes to jug with some home-made mayo or a Dairy Free butter, salt and pepper to taste and wizz till smooth. Speed 5 to 7 is good.

Results for Kogan's performance...

So I tried making the “One bowl” style that I usually make which is weighing the mushrooms in the jug first (unless I forget then I put them in the steam basket on the TM lid) they weighed fine but stuck when I needed to remove the mushrooms to sauté the onions. The blade did not want to release his fungi prisoners and bit me during my attempts to help them to escape.
There are two possible styles of cooking for compensating for the lack of a reverse in the knock offs. One is to use the butterfly on the slowest setting and the other is to just put the setting on slow. If I had a Bellini we could switch out the blade for a blunt blade and continue cooking (now I have a Bellini, I know you can do the whole thing with the blunt blade) and I doubt "not using a blade cover on the Kogan" method will work for another family favourite of Riostto. It is tricky to attach and I have read that someone had theirs come off and the blades chopped it up and it was expensive to replace. So I was going to go with the slow speed forward tonight. Result very tasty Beef Stroganoff some of the mushrooms were chopped in half by the blade which made for a slightly lesser mark in presentation. Biting me made for a lower mark in ease of operation. Overall exceeds expectations +.
Burn marks again on the Kogan tonight when it was finished cooking, I have the dishwasher sorting that out as we speak. I have since found that heating water for about 10 minutes with bicarb soda in the Kogan jug is the most effective way to remove bun marks. They just wipe off.

Judie