Showing posts with label GF pasta/pastry doughs. Show all posts

Aunty Thels Df Gf Ef pastry.

I am so thankful for my BFFs Aunty Thel: the clever lady who made a recipe for biscuit pastry and her lovely family who allowed me to share her recipe. This pastry has changed my life. Today we found that not only can this recipe be made gf and df but also egg free to  this makes a huge difference for parents trying to make lunches for kids with allergies (their own and classmates). If you don't put meat sauce inside the pie it's also perfect for vegans too

Gf Df Ef Aunty Thels Biscuit pastry.

2 *chia eggs* (2x 1 tbs chia seed, 1/4 cup boiling water, stir and leave to sit til cool)
2-3 tbs coconut oil
1 cup gf self raising flour
1/4 cup corn flour

Measure flours and oil into MyCook jar
Mix 5 seconds sp 5 till combined
Add 1.5 chia eggs and press knead button (This dough did not come together the way an egg type does but when you take 2-3 small dough balls, they squish together it's ready allow dough to rest)

Half hour in fridge is good.
Roll dough out.
Cut to size pop in pie maker add filling and lid.
Cook.

You can use any thermo-cooker to make this pastry, or even a food processor. I have chosen the MyCook terminology as it is a little less confusing... Jar is called TM bowl or jug in Thermomix world).

** Results
Dough was easy to roll, a tiny bit chewier than the egg kind but still delish.It dod not brown as the butter and egg type. If doing again and not feeling so lazy in the morning; I would grind the seeds before adding hot water.

*** Fridge dough was made into pies on day 3. Both doughs were a little stiff, but chia dough stiffer. I added some water and worked the dough and it rolled very well. Each dough gave me 1.5 more pies and a small biscuit. I used the base of the chia and lid of the egg dough to make the 3rd pie.

What to do if you have too any pies... You can keep in the fridge for as long as the meat will allow ie if you have fresh meat 3 days, if you are using 3 day old meat obviously it will not last in the fridge. The pies also freeze well too. I have microwaved pies and eaten them cold. You can also reheat them in your pie maker (if that's what you cooked it in). I would also venture to say that they can be warmed in the oven as you would a store-bought frozen pie. 


Meat sauce - MyCook method

4-5 steaks, cubed (stewing meat)
1-2 onions (can use 1 onion and add onion flakes
2-3 carrots
1 zucchini
2 MB's wine (200g)
1 MB water (It was slightly too much liquid so it may pay to add 50g water instead of 100g or less wine)
heaped tbs corn flour (I would add more next time, 1.5-2tbs heaped)
heaped tsp gf *vegemite* (whatever passes for vegemite at your place)
1 tbs tomato paste
1 tbs soy sauce
1 tbs tomato paste
1 tbs Worcestershire sauce
pinch salt and pepper to taste
good shake of paprika
Dash of olive oil
Handful fresh basil

Grate zucchini and basil, remove from jar.
Wash out.
Add oil, set timer for 1 minute 120c, Sauté
Add onion 5 mins, 120c, sauté
at 4 min mark add carrots, 1 min mark add vege stock paste.

Add cubed stewing meat, cook 120c 10 mins sp 1.
Add rest of ingredients cook 100c 60 mins; MB on.
When done check if meat is tender if yes give it 10 mins MB off and allow to reduce. If not do this step with MB on until soft then reduce sauce.
  
Meat sauce - GSM/TM type machine method


Grate zucchini and basil, remove from jug.
Wash out.
Chop onions and carrot, sp 5 few seconds. You want them chopped but not mushy 
Add oil, set timer for 1 minute 120c/Varoma/Steam
 at 1 min mark add vege stock paste.

Add cubed stewing meat, cook 120c/Steam/Varoma 10 mins sp 1/soft...  use blade cover, blunt blades or reverse if available.
Add rest of ingredients cook 100c 60 mins; MC on.
When done check if meat is tender if yes give it 10 mins MC off and allow to reduce. If not do this step with MC on until soft then reduce sauce.

Mini pie method

Find a big glass and a smaller one. The big glass should be about 8.5-9cm in diameter and a nutino glass is perfect for the smaller. It should fit snuggly into the top of your muffin tray.

Roll dough out, use large glass to cut the dough into pie bases
Place pie bases into muffin trays
Add about 2 tbs of pie meat
Carefully pick up smaller dough disk. Run some water around the edge with your finger to help it stick to the base. Add lid.
Cook in moderate oven 10-15 mins

** small pieces of chopped apple are also nice in small pies. If you use pink lady apples no extra sugar is needed. For extra flavour try a little allspice, cinnamon,or Chinese 5 spice.


Cooking with MyCook and Kids

Pie News
First some bad news my estimates completely out as I measured out the mince sauce with a 1/3 cup but the recommended size is 1/2 cup. This resulted in a rather disappointing set of pies with overcooked bases and undercooked lids.
My neice was visiting over-night and I was keen to divert her from the devices today... the easiest way I have found to do this is to offer cooking... so we made more pastry and made some more pies today and added peas (not mushy) and stirred them through the mince before cooking.Everyone was happy except mr Fussy (who does not like peas in his pies).

Gluten Free Bread (Egg and Dairy free too)
We decided to make pies and Gluten Free bread... a new recipe I found here. You do not need a thermo-machine for this recipe. A mix master should work or even mix by hand. I love it, if I didn't prefer whole meal for health, this would be my go-to bread. Basically I needed fresh bread crumbs and thought that if it didn't taste nice it would be an easy way to get some... fyi if wondering, yoghurt bread works out more expensive and goes funny in the freezer. 

Me being well me... I made a few changes...

Orgran for Freefrom gluten flour (I measured 500g)
Oven for slow cookers
Thermomix for MyCook

TBH I was concerned that the lowest setting for MyCook was 40c and I wondered if it was too high. However when browsing actual MC yeast recipes I found that 40c was recommended so I proceeded.

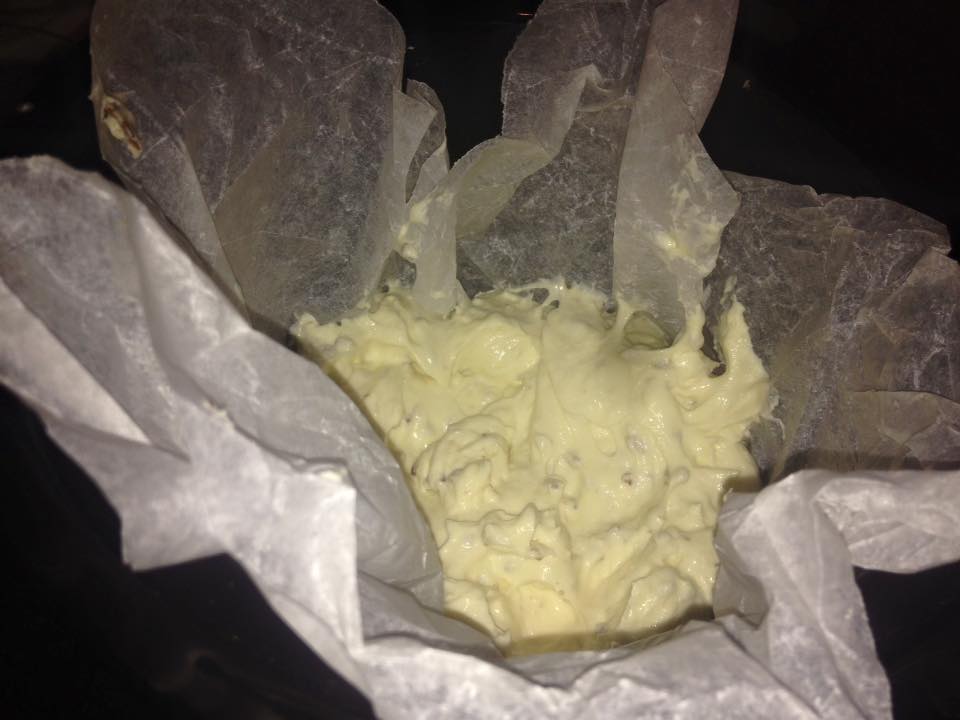
I was surprised that there was no sugar included in the recipe but the yeast did its thing quite well.  Miss J commented that the mixture looked like chocolate chip ice-cream... She was not so impressed with the taste raw, but enjoyed it warm with butter and mighty-mite.

After a quick safety lesson, Miss J was also proficient in using the MyCook lid and found no difficulty getting it on or off.

The bread was lovely and moist with a soft crust. It did not brown as the artisan bread does, but straight out of the oven it was delish. This bread was as easy to make as the "easy bakers" bread from a packet but is nowhere near as salty.

Judie


Australia Day Food... Meat Pies

Meat pies, what can I say... they are yummy and they are Aussie, but if you a gluten free they are frozen, expensive, hard to find and/or disappointing. The really great pies are usually found in small country bakeries... I have fond memories of Bernies (in Rocky), Gracemere, Emu Park, Yeppoon and Mt Morgan (in that order) pies with mushy peas and several flavours to choose from. The decisions - this pie has the better filling; but the base on that one is divine... its all part of the pie-eating culture the ranking of personal favourites then discussing it with your mates... Upon reflection; BP had a nice gourmet pie and so did the chain of bakeries - in Shopping Fair (who calls it Stockland???) and Allenstown plaza. Bakers Delight is on the tip of my tongue but its the other one.

The secret to getting someone to pay $4 - $6 for a pie when they could just get a pack of them for $6 - $8 is making it unique, something they could not make at home, and leaves the eater thinking... I want another one. I cannot say that I am there yet with my pies but they are better than frozen and some gluten-eater bakery pies I have tasted and certainly better than the majority of frozen GF pies I have eaten. Moreover they are much more cost effective, can be eaten cold and are easy to make. 

I have shared with you Aunty Thel's biscuit pastry recipe, on this blog and here but did you know that if you remove the sugar it makes an awesome savoury crust. 

Each brand of GF flour is slightly different. If dough is too sticky just add more flour when rolling it out. If it is too dry add a little water.

  • 160 grams Self Raising Flour, I use Gluten Free (1 Cup)
  • 60 grams Butter
  • 1 egg + a spare yolk or white (whichever you prefer parting with)... if making a double batch just use 3 eggs.
  • Corn Flour, (1/4 cup)
MyCook method (works for TB1 type machine too)
Put dry ingredients into the MyCook jar, close lid

Press turbo for 2 seconds to sieve the dry ingredients.

Weigh in the butter- 60g = 3 tbs, use speed 5, 5-10 seconds until mix looks like breadcrumbs

Add egg, turn dial to closed lid position, press the knead button (Looks like a dough roller)

If making a double batch wizz on sp 5 for 20 seconds first. 
Dough is ready when it looks like a ball of playdough, if it has trouble coming together pop some water in half an egg shell and tip in.  

If it is too sticky just add a little more flour when rolling dough out for cooking. 

GSM method (TM, TC etc)

Put dry ingredients into the jug, close lid

Press pulse for 2 seconds to sieve the dry ingredients.

Weigh in the butter- 60g = 3 tbs, use speed 5, 5-10 seconds until mix looks like breadcrumbs

Add egg
Wizz on speed 6, 10 seconds then speed 1 for 1 - 2 mins. (If using a machine that has a knead button press it and knead till its done)
Dough is ready when it looks like a ball of playdough, if it has trouble coming together pop some water in half an egg shell and tip in.  

If it is too sticky just add a little more flour when rolling dough out for cooking.
 

Meat Sauce (MyCook)
Heat oil in MyCook jar for 1 minute 120c on Sauté 
Add onion (quartered) some pepper, paprika and any seasoning you like... I added onion flakes as my onion was a little small. 5 mins, sauté 
** if adding Tomatoes or Carrots you will want to add them here**

Towards the end of the 5 mins, add a tbs Veggie stock paste

Set timer for 10 mins sp 1 - 2 (If using a TB1 type machine, add bade cover here)

While blades are moving add mince in large chunks through the beaker hole in lid. Then add 1 tbs corn flour and another of tomato paste; 1 measuring beaker each full of water and wine, a very heaped tsp of whatever passes for Vegemite in your house, any veggies you want to add.

Keep an eye on the mince. When it is cooked turn it off and pop into a casserole dish/thermal dish 

Meat Sauce (GSM, TM, TC etc)
Chop onion sp 7 add oil to jug for 5 minutes, sp 1, ST, Varoma etc (higher than 100c) to Sauté 
** if adding Carrots you will want to add them here, "grated" with onions** 
Add some pepper, paprika and any seasoning you like... I added onion flakes as my onion was a little small. 5 mins, sauté 
** if adding Tomatoes you will want to add them here**

Towards the end of the 5 mins, add a tbs Veggie stock paste

Set timer for 10 mins sp 1 - 2 / spoon + reverse (If using sharp blade swap to blunt)

While blades are moving add mince in large chunks through the beaker hole in lid. Then add 1 tbs corn flour, and another of tomato paste, 1 measuring cup (100mL) each full of water and wine, a very heaped tsp of whatever passes for Vegemite in your house, any veggies you want to add.

Keep an eye on the mince. When it is cooked turn it off and pop into a casserole dish/thermal dish

I have not tried this yet but it may work to steam the meat in the rice basket with some salt and the wine and add to veggies in the last minute of cooking.
Pie Peas

Honey does not agree, but what is more awesomely

Queenslander than peas in your pie... Add some frozen peas and water to your jar (we like McCains), cook 

If peas are cooked but not mushy pulse your turbo button for 1 - 2 seconds. Repeat if needed... Making your own mushy peas helps to avoid the additive tartrazine in your children's food.

 Judiet


Pastry

   IMG_0617[1] 3 weeks ago, I had a craving for apple pie, I searched the internet for a GF recipe for pastry and found one to try. It was disappointing. The pastry did not stay together and was rather holey on the top. It tasted ok but it was not the smooth texture I love in a pie.
The local foodworks sells a brand of apple pie that Honey and I both like... actually I loved it until I experimented and realised I liked the apple filling better from the pie I made (Which was made from raw apples not steamed) and I also realised that there is palm oil in it.
I decided to look for alternatives, while talking to my awesome cook friend Ebony... we realised that every GF thing she makes me is just her regular recipe with white wings GF flour substituted with the wheat flour. She has a secret family recipe that she shared with me. Maybe you are aware of a great recipe for pastry too but are unsure how to convert it... I backed off the water slightly so that the dough was not too sticky and added 1 tsp of xantham gum. It may be helpful to know that the recipe called for eggs which is also another good substitute for gluten in the GF flour... giving the dough elasticity.
IMG_0619[1]The result... very yummy apple pie.
 This is where I found the apple filling recipe, I do not recommend the pastry however. The second time I made this my computer was playing up and I remembered the basic ingredients but had to guess at the ratios. It worked just fine.
But how does the EDC recipes for pastry compare to my BFFs Aunty Thel's biscuit pastry? Well tonight I found out. Its not easy to miss out on pies when you know what you are missing. Honey is fantastic about not “rubbing it in” that his digestive system is more cooperative than mine... but today he was hungry and while he was eating... I remembered how much I loved an O'Grady's pie back in the day.

So the mince I had taken out of the freezer yesterday with the intention of making bolognese was re-purposed and I made a GF pie with TM shortcrust pastry on the bottom, TM savoury mince in the middle, TM puff pastry on top and TM mushy peas on the side.
The idea was to take the recipe, use White Wings GF flour, xantham gum and back off the liquid just a bit. Well I forgot the Xanthum Gum in the shortcrust pastry. It was nice raw; held together in a ball quite well but very uncooperative for the rolling pin. I ended up pressing it into the pie plate and putting the mince on top. I will try this again another time with the gum. IMG_0621[1]

I just chucked a bit here and there from the fridge... 400g mince, 1 onion (Chopped it first on speed 7 and cooked on varoma speed slow with a dash of oil) 1 medium red capsicum (wizzed speed 7 with cooked onions, cooked a further minute) a few chopped mushrooms, an MC of red wine, MC of water, stock pdr, vegemite and a very heaped tbs for corn flour. Cooked on Varoma temp for 15 minutes. While I rolled out the pastry.
Looking back I perhaps should have rolled the pastry between 2 sheets of baking paper. It would have saved the fold marks from appearing in the top. This one was much easier to roll but picking it up in one go was a challenge. Perhaps there is a trick to it. There was just enough left over to try making a vol au vent or 2. They turned out more like a savoury biscuit, but were nice enough but certainly not like ordinary puff pastry, more akin to a shortcrust.
The pie was very filling and very nice (we usually like a ¼ slice of quiche but a 1/5 slice is probably more do-able for the pie- unless you are fanging... really hungry). It held together better than I expected (esp considering that I was tired of waiting and did not give it standing time before cutting). I can also confirm that the pie was very lovely re-heated and cold the day after. I now dream of making small pies, popping them in the freezer and having them for lunches. I think next time, I would use cubed beef rather than minced beef for a more gourmet “feel” to the pie. For an evening meal pie, I would probably do a mashed potato lid next as there is rather a lot of butter in the pastry. IMG_0620[1]
I had cooked the pie in the oven at 200c for 20 mins and backed it off to 180 for another 20 mins (as per puff pastry directions). While that was going, I cleaned my TM bowl and popped half a bag of baby peas into Thermie cooked it with a tsp of sugar, dash of salt and an MC or 2 (100-200mL) of water at varoma temp speed slow for 10 mins (MC firmly in place). I then checked it had enough water, popped it onto speed 4 and cooked it for another 5 minutes... the most delicious pie peas ever.
The next recipe I tried and used 40g of iced water

Puff Pastry
  • 120g unsalted butter
  • 80g lard (I used more butter)
  • 250g cake flour (GF) and I tsp xanthum gum
  • pinch sea salt
  • 2 tsp lemon juice
  • 50g to 100g icy water
Make your pastry by chopping butter into into cubes. Place into the fridge on a plate or shallow bowl.
Place flour into TM bowl and press turbo button 2x to seive.
Place remaining pastry ingredients except water into Thermomix bowl and blend for 5 sec/speed 6. You should have a breadcrumb look.
Add water starting with 50g and add more if needed... and knead for 10-20 seconds until dough forms a rough mass. You should still be able to see small chunks of butter. Remove dough and roll out into a rectangle on floured surface.
Fold each end of the pastry over on top of itself in thirds.
Roll again and repeat this process 3-4 times.
There are a few more puff pastry recipes around I would love to try but they require a silicone mat (which are $40 to $60). So that will be not for a while.
Its funny I thought if I packed my TM away I would “never” use it (and was quite annoyed at Honey when he wanted it to be in its home more)...but since I have to pack it away each night... I'm using it more than ever. The more I use it; the more I love it. We lent our Kogan to a friend... maybe I can get him to write a blog or 2... I cannot say I would be lending my Thermomix any time soon though, I'm just not that generous.
Judie


Aunty Thel's Biscuit Pastry

I am beyond pleased to tell you that my BFF checked with her family and it's ok to share the pastry recipe with you. I feel honoured that I am able to honour the memory of a wonderful lady by posting one of her recipes. The one request her family made was that it continue to be known as “Aunty Thel's biscuit pastry”.
You will need
  • 1 cup SR flour (I use white wings/freefrom  GF flour)
  • ½ cup icing sugar (I used raw sugar and it worked, or you can wizz it in your TM... before putting other ingredients in)
  • ¼ cup corn flour (Be sure to use maize corn flour not “wheaten cornflour” which is made of wheat)
  • pinch of salt
  • 3 tbs marg (butter works too)
  • 1 egg
Method
  • Sift dry ingredients
  • Rub in marg
  • add well beaten egg and cut through with knife
  • knead in bowl
  • roll out as required (Its yummy raw)
  • bake in moderate oven til golden brown (approx ½ hour)
THERMO method (I used a double mix so that there was enough for a crust and lid... it all fit)
  • pop dry ingredients into TM bowl, turn the dial to closed lid position
  • press turbo for 2 seconds to sive the dry ingredients.
  • Weigh in the butter- 60g = 3 tbs, use speed 5, 5-10 seconds til mix looks like breadcrumbs
  • Add egg, turn dial to closed lid position, press the knead button (Looks like wheat)
  • knead till the dough comes together (I think mine took about 20 seconds)
  • bake in moderate oven till golden brown.
Time to test it on the people blessed with cooperative digestion systems; that's right the “glutenli-abled” or people who do not have to eat GF food if they don't choose to...
I took this pastry (as an apple pie) to 9 friends, and we were quite full by the time dessert came out... and it was a hit. They liked it as much as we did. Yea!
JUDIE


Thermo mixing

This is a text I sent to my friend who is a TM consultant...
Hi Vanessa 
How are you? I'm pretty excited... 
IMG_0607[1]I just had lunch with my husband... I took him pasta fagioli. Since we had leftovers for dinner last night and he usually takes leftovers for lunch. Really I think I just wanted to see him a few hours earlier Lols. 
Wow nearly zero effort (I used the method you taught me) with cooking the pasta in the thermoserver, made his work mates in the office jealous and his co-worker happy as we shared some with him... (He's a celiac vegetarian) all in the space of an hour... He (Honey) even has lunch for tomorrow now. 
I've made this twice for the two guys the first time with just the one can of mashed kidney beans and rice macaroni from the Asian store. 
Today I made it with corn pasta and also added the second can of beans but used butter beans for the 2nd can (as I found that both boys are beans fans)...  IMG_0609[1]
We liked both but loved today's with the corn pasta. The rice pasta was cheaper though. Just thought this info might be useful for demos with GF clients. 
Now I'm off to make the pasta for carbonara tonight. I'll let you know how it goes too
You could make pasta fagioli (which means pasta with beans) said like this... its well worth the effort to say it properly as it sounds so much more delicious and complicated to make.
and you can make it like this the “hard” way... like this or even this...
But my friend showed me a few months back a super easy way to make it with a TM and I discovered to my delight that it works just as well with GF pasta as it does with the regular kind. This pasta does not seem to be available any more in Woolworths however the Gluten Free San Remo and Barilla pasta's are now a great substitute.

IMG_0602[1]I am pretty sure it would work as well in the Kogan however you will need a fake thermoserver. I have checked at the local Asian stores in Rocky and they did not have any in stock at the time the man from Flavourin Food World 157 Musgrave st said they get them in from time to time. He is beside the Indian Restaurant in the block just before the post-office heading from the bridge to shopping fair. I am never in town long enough to keep checking.

Pretty much the food-server keeps hot food hot, it is plastic on the outside (looks like Tupperware) and metal on the inside and is insulated. Apparently they also come with metal on the outside too- but I have only seen the plastic ones. They had them everywhere in the cheap stores in Cabramatta/ Fairfield area of Sydney.
Parmesan Cheese for serving (a squirt of lemon juice is also nice)
  • 1 small red chilli (I just give my Mexican Chilli bottle a good shake)
  • 1 clove garlic (I use 2)
  • ½ onion (I use a full one)
  • 50g Olive oil
  • 1 celery stalk, roughly chopped inc leaves
  • 1 can Borlotti or Cannelini beans, drained (Optional- leave out if your family is bean-phobic)
  • 1 can Kidney beans, drained
  • 2 fresh tomatoes (I used ½ a can)
  • 2 tbs veg stock
  • 900g water (I include beans water in this amount)
  • 300g small pasta
Place Parmesan cheese into TM bowl grate 10s speed 9. Set aside
Place chilli, garlic and onion into TM bowl, chop 3s speed 7
Scrape from sides of bowl using spatula
Add oil sauté for 2 mins 100 degrees speed 1 (I usually give it 5 mins)
Add celery with leaves, kidney beans, tomatoes and stock and pulverise
Add water, 2nd can of beans (if using) cook on reverse speed soft 10 mins
Pop pasta into the thermoserver
When the timer goes off, pour the hot sauce mixture over the pasta and cover with TS lid.
Do something fun...
10 minutes later give the Pasta Fagioli a stir and cover again
continue with fun thing...
Stir the mixture again in 10 minutes the pasta should be soft...
Add parmesan cheese and or lemon juice and salt
Serve.
The pulverised kidney beans make the PF look like there could be meat in it and they usually won't miss the meat. Cheap, easy healthy... awesome.

IMG_0611[1]Homemade GF pasta
Making pasta dough is dead easy in the Thermomix (and I assume the Kogan too).
For this recipe I grabbed my TM everyday cookery book and swapped the wheat flour for GF with a dash of xantham gum.
  • 300g plain flour
  • 3 eggs
  • 1 tbs olive oil
2 minutes on the kneed setting
IMG_0610[1]

I ended up using 400g of flour (My hand slipped, recipe just said to add 1 egg for each 100g flour). Also our chooks are quite young so they lay small eggs so I kept adding more till the mixture was right... it took 7 small eggs.
I left the dough to rest for ½ hour and researched ways to make flat pasta without a pasta maker. I found this one, and decided to make my pasta using smaller balls as I have a much smaller rolling pin.
IMG_0613[1]I kept some pasta flat for lasagne recipe here

Others, I rolled the into scrolls and chopped them with a knife at about 1cm intervals. They unrolled nicely into fettuccine.
I later cooked them in boiling water and added cabonara sauce (made in the thermomix)

 Seafood Cabonara
  • 1 onion chopped speed 7
  • sauté in 25g butter 3 mins varoma temperature
  • Add some bacon sauté for a further 5 minutes
  • add 50g flour, 25g butter 500g milk and mushrooms
  • cook 90 degrees, 7 mins speed 4.
  • At 5 minutes to go add a handful of green prawn meat (optional)
  • At 1 minute to go add 1/3 cup parmesan cheese

IMG_0612[1]I didn't have much luck with milk sauces in the Kogan, however it probably just needed some tweaking. People with a thermochef were great at blogging advice for the Kogan.
The pasta was a little thick but we really enjoyed having the fresh stuff. I may yet invest in a pasta roller but apparently they are a pain to clean... I am looking forward to ravioli and cannelloni which I have not had in ages.
  The next day I made Lasagne with the pasta, and used the TM to make perfect cheese sauce. With rolled pasta, you can have your lasagne any shape you wish.

JUDIE